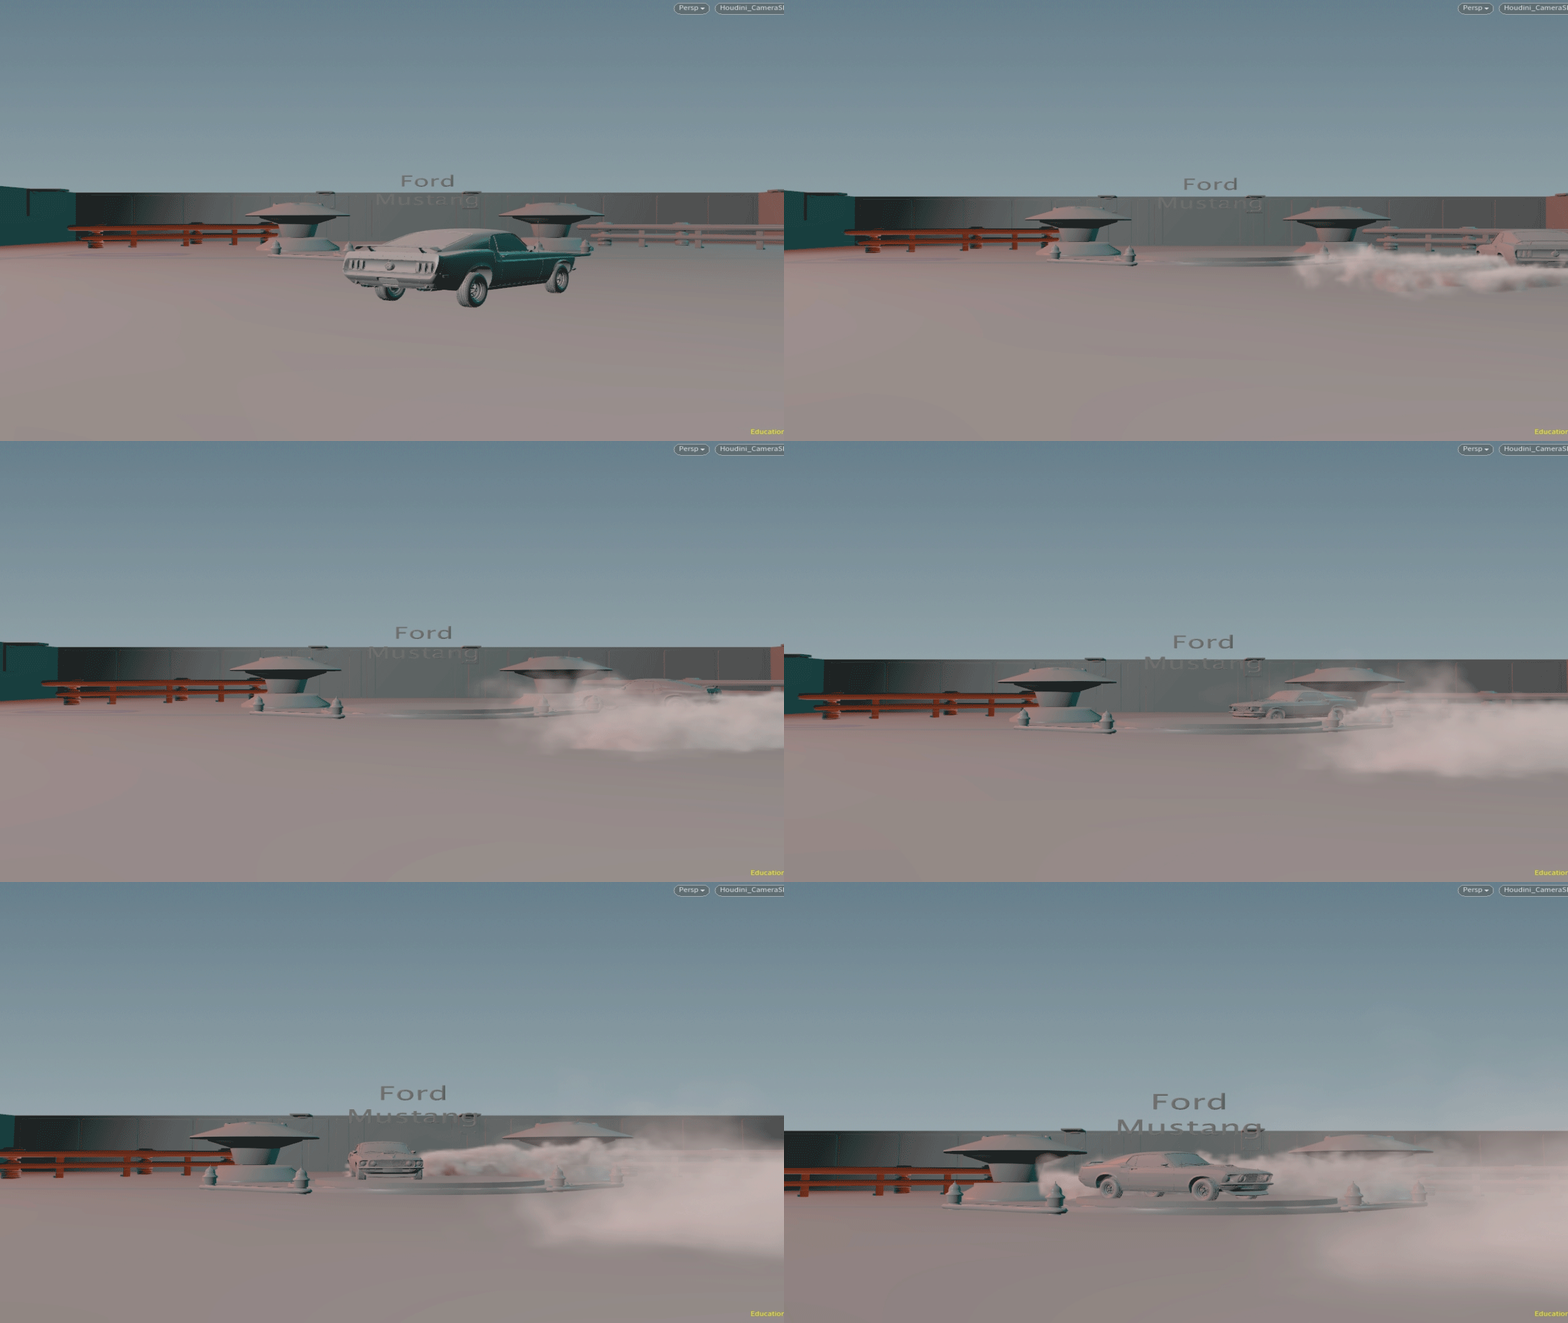
I've been working entirely in Houdini this week. It's been fun to analyze different types of burnouts. They can be wispy thin trails, thick billowy plumes, or anything in between.
I'd like to edge on the side of thick and billowy for our project. The plumes will hopefully create a sense of drama.
Here are a few references I've been looking at:
Here's another great example from an episode of Breaking bad:
I'm currently using two emitters for the smoke. The first source is providing kick-up from the contact point between the ground and the tire. I have animated the particle velocity to be perpendicular to the direction the car is moving. I also used POP Collision Detect so that particles would stick to the wheel wells and car body to emulate the way smoke wraps around the vehicle in the reference.
The second emitter is in the wheel well to create the illusion that smoke is being carried across the surface of the fast-moving tires.
Both emitters have animated noise applied to their density and temperature fields. Here is a walkthrough of some prominent parts of the Pyro Simulation:

I decided to animate the contribution of the density, velocity, and temperature fields from both emitters by hand for maximum control. Since we are still using test animation and it will all change I didn't spend too much time getting the animation to look perfect.

I'm using a variety of micro solvers to create an interesting billow effect. I added just a kiss of shredding to break up the recognizable turbulence. Another method I used was seeding
spinning particles within the simulation to create small vortex swirls. I modified the Seed Vorticles shelf tools to do so.
I used a Uniform Force DOP in combination with a noise DOP in an attempt to recreate the appearance of the smoke sticking to the ground around the base of the car as seen in many of the examples in my reference. The effect is fairly strong and may need to be reduced.

Here's my result so far:

I'm going to work on adding high-resolution details this week.
Update 1/28/2020
I've been focusing on increasing the fidelity of my simulation. By implementing Pyro clusters I'll be able to squeeze as much resolution as possible out of the sim. Clustered Pyro simulations can also be much faster because Houdini won't have to deal with all of the space in the fluid bounds which are being unnecessarily calculated. I created a line from the centroid of the Mustang and using a Trail SOP, then piped that into a Cluster Points SOP.
This can be improved. First, the bounds are not oriented to the car which still leaves a fair amount empty space in the fluid container. Second, the bounds are increasing on a single axis independent of the Mustang being within that particular bounding region. I suspect that this won't be an issue in the end since my volume will not be dissipating quickly enough for it to matter. I'd still like to get to the bottom of it.
To create oriented containers, I used a technique learned from Tighe Rzankowski's awesome tutorial you can find here. I started by generating normals from the tangent of my path using the Polyframe SOP. I then used VEX to extrapolate that normal to a side and up vector.
In DOPs, I set my Smoke Object to 'Create Objects From Points', and referenced the current point that the car is passing through. I then used the Point Position DOP to rotate the container to the normal we generated.

Now I need to get my source fields to play nice with this new cluster setup. Stay Tuned!
Update 2/1/2020
I was able to get my source fields to work with the clustered setup by cannibalizing the for loop in the Smoke Trail shelf tool. It applies the density cluster to the current volume bounds.
After I got this working, I started testing out different amounts of clusters. A setup with many overlapping clusters is not only unnecessary (defeats the purpose of clustering because many volumes are calculating at the same location), but can be detrimental to the appearance of the simulation. The sim can end up looking very uniform since the same noise patterns are being used in each volume boundary.

I had to create more boundaries than I would like to, as the second instance point is spawning at the origin, as opposed to its correct location in space. I put a band-aid on the issue by creating more boundaries than necessary to fill the gap where that volume isn't being created. Once I figure this out, I'll be able to capture the entire burnout in two oriented bounds, but for now, I'm creating four.

Update 2/2/2020
Unreal Integration Woes
The last step of this process was to integrate the volume which I rendered in Mantra to our Unreal scene. I have reached a tipping point where this will no longer be feasible. My issue resides in Sequencer's handling of camera-parented geometry. Parented geometry is visible in the Unreal Editor, but when I go to write out the sequence, the geometry is immediately unparented from the camera.
This has caused me to rethink my approach. I'd like to use the technique I've been developing for the past five weeks, but it may be time to look at other options. It's quite a painful switch, but I'm going to work from a Niagara-centric approach from this point forward.
Not all is lost. I've gained a lot of knowledge on how to write out volume normal maps from unreal Using the Texture Sheets ROP. This will be very useful in creating a new burnout. I've been kicking myself today over whether or not I should have started this process in Niagara from day one, but I couldn't have known that this issue would appear. I will stay positive and tackle Niagara head on!
